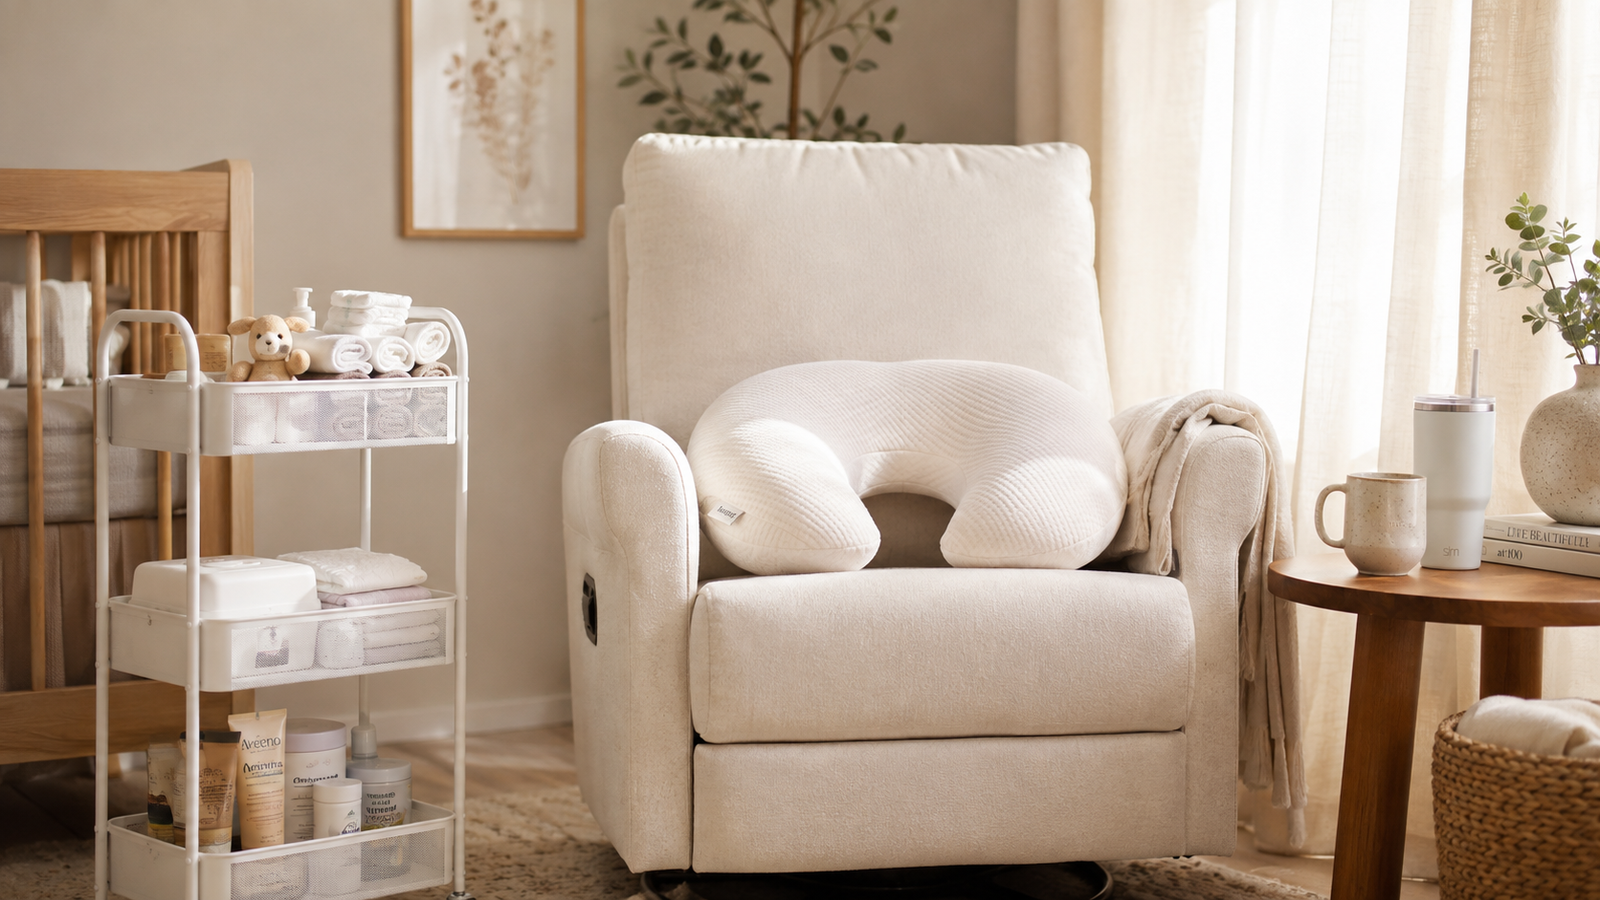
A comfortable feeding station setup combines supportive seating with a well-stocked rolling utility cart. First, choose a chair with firm lumbar support, a nursing pillow, and a small footstool to elevate your knees. Next, organize a three-tier cart with burp cloths, nipple care or bottle supplies, one-handed snacks, and a straw water bottle. Finally, keep a dimmable warm night light and a long phone charger within arm reach.
Newborn infants feed between eight and twelve times every single day. Because each feeding session often lasts twenty to forty minutes, new parents spend roughly six to eight hours a day sitting in one spot. When you add middle-of-the-night cluster feeding, physical exhaustion and muscular soreness can quickly take a toll on your body.
Therefore, creating a dedicated feeding station setup transforms these demanding hours into a calm, comfortable routine that supports your posture and keeps every essential item within reach.
Why Feeding Ergonomics Matter for New Parents
Holding an infant in your arms for extended periods places tremendous repetitive strain on your neck, shoulders, and lower back. Many parents make the mistake of hunching forward to bring their chest to the baby rather than bringing the baby up to their chest.
Over several weeks, this hunched posture causes upper back tension and tension headaches. In addition, when you are trapped under a sleeping or feeding infant, realizing you forgot your water bottle or a clean burp cloth causes immediate frustration.
A well-planned station prevents posture fatigue while ensuring you never have to break your baby’s latch or bottle seal to grab a forgotten supply.
The 4 Layers of an Efficient Feeding Station
Building your feeding corner in structured layers ensures you balance physical comfort with functional organization.
1. Ergonomic Seating and Physical Support
Your feeding chair serves as home base for the first four months. Whether you choose a modern glider, a recliner, or a comfortable armchair, physical adjustments make a major difference.
Use a Dedicated Footstool
Resting your feet flat on the floor can pull your pelvis backward, causing your lower back to round. Placing a small footstool or wooden step under your feet elevates your knees slightly above your hips. This simple shift supports your lower spine and creates a natural lap angle that prevents your baby from rolling away.
Choose a Firm Nursing Pillow
Soft, squishy decorative pillows tend to sink under your baby’s weight, forcing you to lean forward. Instead, use a structured, firm feeding pillow that clips securely around your waist. A firm surface supports your infant at breast or bottle height without requiring arm muscle strain.
2. Organizing the 3-Tier Rolling Utility Cart
A rolling metal utility cart is the gold standard for any feeding station setup because it moves easily from the nursery to the living room or bedside.
Organize your three tiers strategically from top to bottom:
- Top Tier (High-Frequency Essentials): Keep items you need during an active feed, including organic nipple butter, hydrogel soothing pads, silicone milk collectors, clean bottle nipples, pacifiers, and a large stack of folded cotton burp cloths.
- Middle Tier (Diaper & Hygiene Supplies): Store twenty diapers, a full pack of baby wipes, diaper rash cream, hand sanitizer, and a spare infant sleeper for sudden spit-up emergencies.
- Bottom Tier (Parent Comfort & Backup Gear): Store extra breast pump parts, milk storage bags, a light swaddle blanket, extra burp cloths, and backup parent snacks.
3. Hydration and One-Handed Nutrition
Producing breast milk requires substantial fluid intake, and nursing triggers immediate thirst through oxytocin release. Even if you are bottle feeding, staying hydrated keeps your energy steady during long wake windows.
The One-Handed Straw Tumbler
Always choose a large insulated water tumbler with a built-in straw. When you have an infant resting on your arm, unscrewing a water bottle cap or tipping a wide-mouth cup is nearly impossible. A straw tumbler lets you sip hydration silently with one hand.
High-Protein Snacks
Stock your station with snacks that require zero refrigeration and can be eaten cleanly with one hand:
- Roasted almonds, cashews, and walnuts.
- Protein bars and oat lactation bites.
- Dried fruit, pumpkin seeds, and fruit strips.
- Individual squeeze pouches of nut butter or applesauce.
4. Night Utilities and Calming Lighting
Navigating 3:00 AM feedings in a fully lit room stimulates your baby’s brain and ruins your natural melatonin production. Consequently, your lighting setup dictates how quickly both you and your infant fall back to sleep.
Warm Amber Night Lights
Bright overhead bulbs or cool blue LED lights signal daytime wakefulness to infant circadian rhythms. Use a touch-activated, rechargeable night light with warm red or amber tones. Set it to the lowest visible brightness so you can see your baby’s latch or bottle measurements without waking them completely.
Extended Phone Cables and Wireless Earbuds
Keep a ten-foot braided charging cable permanently plugged into your feeding corner outlet. In addition, keep a pair of wireless earbuds nearby. Listening to audiobooks, podcasts, or calming music helps you stay awake and alert during dangerous late-night exhaustion windows.
Breastfeeding vs Bottle-Feeding Station Comparison
| Feature | Nursing Setup Priority | Formula & Bottle Setup Priority |
| Top Shelf Gear | Nipple butter, silverettes, breast pads | Measured formula dispenser, clean bottles |
| Pillow Style | Wrap-around firm latch pillow | Angled arm support or standard cushion |
| Hydration Needs | 32 oz straw tumbler + electrolytes | Insulated water bottle + warm water thermos |
| Spit-up Defense | 4 to 6 large cotton muslin burp cloths | 6 to 8 heavy-duty absorbent cloth diapers |
| Sanitization | Hand sanitizer and pump wipes | Quick bottle brush and spare clean nipples |
Adapting Feeding Stations for Small Spaces
If you live in an apartment or lack space for a large nursery glider and rolling cart, you can still build a highly functional corner.
- The Portable Caddy Solution: Use a lightweight felt diaper caddy with dividers instead of a rolling cart. You can easily pick it up by the handles and carry it from your bed to the sofa.
- Floating Wall Shelves: Install two small floating shelves next to your living room armchair to hold your water bottle, night light, and wipes without taking up valuable floor space.
- Bedside Basket: If you feed primarily in bed, place a shallow woven basket on your nightstand containing solely nighttime feeding essentials.
Common Feeding Station Mistakes to Avoid
Avoiding these simple layout errors will keep your daily routine running smoothly:
- Placing the cart out of arm reach: Ensure you can reach the top shelf without unbuckling your pillow or leaning forward.
- Using noisy Velcro organizers: Hook-and-loop closures make loud ripping sounds that startle drowsy infants. Choose open fabric bins or magnetic closures.
- Overcrowding the top surface: Keep the main table or top shelf clean so you have space to set down a bottle or burp cloth quickly.
- Forgetting parent lip balm and hand lotion: Frequent hand washing leaves skin cracked and dry. Keep a moisturizing balm right next to your sanitizer.
Creating a Peaceful Routine
Feeding your baby is one of the most frequent activities of your first year as a parent. By taking thirty minutes to organize a dedicated feeding station setup, you remove daily friction from long nursing and bottle sessions.
Remember that taking care of your physical comfort directly supports your baby. Set up your space, settle into your chair, and enjoy these quiet bonding moments with your little one.
FREQUENTLY ASKED QUESTIONS
Where is the best place to set up a feeding station?
The best location is wherever you plan to spend the most time during daytime and nighttime hours. Most parents set up their primary station in the master bedroom next to the bassinet for the first three months, and later move it into the nursery near the glider chair.
What should I put in a breastfeeding basket for the living room?
A living room nursing basket should include three clean burp cloths, a water tumbler, high-protein snack bars, nipple ointment, silicone breast pumps or milk collector shells, hair ties, and a long phone charger.
How do I prepare a bottle feeding station for the night?
Prepare measured powdered formula in portioned dispensers and keep pre-filled water bottles at room temperature next to your station. If using refrigerated breast milk or pre-mixed liquid formula, consider placing a small cosmetic mini-fridge in your bedroom to avoid nighttime kitchen trips.
How many burp cloths do I need at a feeding station?
Keep at least four to six clean, absorbent burp cloths at your station at all times. Newborns frequently spit up multiple times during a single burping session, and having extras on hand prevents frantic searches for clean linens.